Came inside from doing stuff outside for a coffee break – and a cookie.
My personal tin of Jacobsens Bakery Denmark cookies.

Came inside from doing stuff outside for a coffee break – and a cookie.
My personal tin of Jacobsens Bakery Denmark cookies.
Noticed this morning that the lower wheel cover which also serves for dust extraction is not closing flush at the bottom.


From the last session we need to fit one more panel across the top.
This is the first stage of hopefully a reasonably effective dust extraction setup to which I can attach a workshop vacuum.

Something that has bugged me with the activity log is the ability to go back directly to a specific year AND month. The main reason for this is when I fall behind with updating my WordPress blog to match my Facebook posts it requires to much effort painfully paging down through the activity log to find specific posts. Same for when I go through my photo archives and come across pictures and would like to review the related Facebook posts where they were used – if that makes sense.


Betty is our Garmin nuvi 2597LMT GPS that we bought off our older daughter a few years ago. The battery has been showing signs of dying so got a replacement one off eBay for less than $15 dollars. Battery arrived weeks ago and been sitting on the balcony computer desk and when I finally got around to doing the job could not find the bloody thing.

Tiny TORX screws... do I have bits that small?
House cleaning today plus need to get the green bin ready for collection.

So we’ll do a small job and add some more bracing.
We will make the wheel covers from thin MDF with pine frames.

A few weeks ago ran out of 3mm MDF, so made sure when I did do a Bunnings trip in the van for general stuff - to get some.
With the left blade guard done we should now doo the right side.


From the previous related post on this with the lamp fitted into the front of the can we can now make the base.


Marked out the base on a piece of MDF.
Decided to try and make a MR16 LED work lamp.
I always have a supply of pop cans in the workshop, they make great shim material and a common use for me is to fit bearings onto shafts.

For this particular LED lamp a small coke can is exactly the right diameter. I need to buy some MR16 lamp holders but in the meantime lets have a go at making one.

Just a update this morning before we go to market and shops.

As with the upper guides using a piece of laminate flooring to mount the bearings.
I don’t have the right length 8mm bolts so they are just sitting there with no nuts at the back.

With the left blade guard fitted…to safeguard fingers we can move onto making the lower blade guides.

First thing is to remove the table.

In the previous session we finished the electrical wiring which was simply connecting the motor via a NVR switch to mains input. It’s nice being able to power on & off at the front of the saw.
For this session we are going to make the left side blade guard. The power switch is close to the blade on that side so it’s a priority to get this done. I’m using a length of Colorbond corner trim left over from the actual garage construction. Screwed one side of a hinge to a bit of MDF and pop riveted on one end of the trim.
From the last session prepared the cables with connectors.

Now to run the cables down and into the base box.
From the last session I was going make a knob for the blade tracking threaded rod but decided to install the front mounted NVR power switch and wire up the saw motor.


With the epoxy cured well enough to continue we can mark out the handle profile.
Finished the tension leaf spring (damper).

Move on now to making the tension rod crank handle. From MDF the handle itself plus two blocks to hold the 5/16” nut coupler.
Picking up from where I left this morning…

we will continue with the ‘leaf spring’.
The upper wheel assembly still needs a tension leaf spring which acts like a damper to absorb upper saw vibrations. This also prolongs blade life.
Completed the under table bracing making sure I aligned things as I went along.

With the upper blade guides completed and before moving on to the lower guides I’ll do some more work on the table. Even though this is a temporary one it still needs to be sturdy and square in all directions with respect to the blade.

Using a Stanley roofing square to check across and down the table.
From the previous session we finished with the thrust bearing sliding arm, which also contains the sliding guide block from the top, which is now ready to drill and file a slotted hole through which will pass a 5/16th rod.

Need to drill out the pilot hole with a 6.5mm bit and the run through a 5/15th tap.

From the last session added a piece of MDF to the top of the bearing guide block.
Continued with the blade guides.

From the last session this is where I left things.
Needing some more 608 bearings went into Kmart for another skateboard and was pleasantly surprised, they had the larger 31” board on sale for $15.

Also got some Loctite Super Glue, have immediate need for that to bond the threaded rod with the lock knob that’s part of the clamp assembly of the sliding guide arm.
Also got some cheap quality hose clamps from the $2 shop to lock the wheel shafts. A bit peeved that they came around at ALDI not long ago and I didn’t grab two box’s – next time.
This is another interesting stage where we can start planning to setup a temporary table and begin construction of the upper blade guides.

Even with a temporary table I still need to know where the blade position will be so I can make the blade access cut on the table saw. So the first thing is to mount the blade, and make sure tension and alignment are correctly set.
With the basic blade guide arm setup and before we start making the actual blade guides we need to make ready a temporary table and put that aside for now.
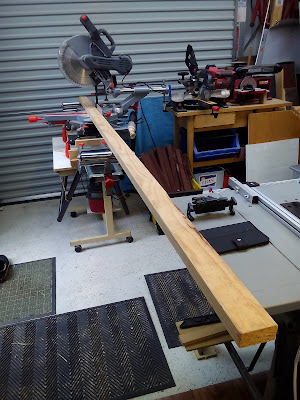
Running out of off cuts so got down a 2400mm length from my stock of MG10 pine.
From the last session we are going to cut out the ‘throat’ so we can mount a temporary table which will be replaced later on with a final version.

After this we’ll get back to the blade arm, working down to something I like making – blade guides.
Back again after lunch to fit and epoxy the lock knob nut.

After marking out carefully chisel out to recess the nut into the knob.
The bearing guide arm slides up and down and needs to be locked at the desired height.

This is where we left the last session and we now need to make the arm lock.
Afternoon session to continue with the blade guide arm construction.

Screwing down the MDF pieces that clamp the sliding arm.
Some workshop sessions are more rewarding than others, this is one of them.

With the horizontal support arm and the upper wheel mount assembly all setup and test run with the blade we can start thinking about the blade guide arm. Measured and cut off flush the end of the support arm.
As posted last week picked up this saw from Waverley Gardens for $49 marked down from $99. They came around in October for $140 so I was happy with the purchase.

During this session generally added more bracing to make the main vertical support and the upper wheel assembly horizontal arm more robust, to minimise shaking and vibration.

More pine and a bracing board on the side.
With the saw now clamped down on the low table with just the lower wheel the shaking has been reduced to an acceptable level.


